
When you're deep in the backcountry, paddling a remote lake, or perched at a windswept summit prepping your next trail meal, one thing can make or break your experience: how well you stored and packed your food. Trail food storage isn’t just about convenience—it’s about protecting ingredients from spoilage, avoiding spills, deterring wildlife, managing weight, and ensuring your meals come together smoothly when hunger strikes.
Whether you're out for a weekend or a multi-day expedition like the Bowron Lake canoe circuit, your choice of containers can make your outdoor kitchen shine—or cause frustration. This guide explores backpacking food containers, spice kits, vacuum-packing, and more, with chef-backed tips for short and long trips.
Table of Contents
- Why The Best Food Storage Matters in the Outdoors
- Food Safety Guidelines for the Trail
- Plastic vs. Glass Containers – What’s Right for Your Trip?
- Spices & Seasonings – Small Containers, Big Flavor
- Storing Liquids – Leak-Proofing Oils, Sauces, and Syrups
- Vacuum-Packing for Trail Chefs
- Bags vs. Rigid Containers – When to Use Each
- Sustainability in Trail Food Storage
- Storage for Paddling Trips – Water Changes Everything
- Pro Packing Tips From a Chef
- Trail’s End: Your Food Storage Takeaways
Let’s dive into storage options tailored for your adventures, from backpacking to paddling meal prep, so you can keep your food fresh and your pack organized.
Why The Best Food Storage Matters in the Outdoors
Trail food storage is a pillar of outdoor cooking. Here’s why it’s critical:
- Food Safety First: Inconsistent temperatures, humidity, and air exposure can spoil perishables fast. Proper storage prevents bacterial growth.
- Weight & Space Efficiency: Smart storage reduces bulk and protects fragile foods.
- Leak and Spill Prevention: The right containers minimize messes in your pack.
- Wildlife Deterrence: Airtight, smell-resistant storage deters animals.
- Organization: A well-packed system saves time at camp.
Food Safety Guidelines for the Trail
Food safety is critical in outdoor environments with fluctuating temperatures. Mishandling perishables can turn ingredients into health hazards.
Safe Temperature Zones
The "Danger Zone" for food safety is 4°C to 60°C (40°F to 140°F), where bacteria multiply rapidly. Perishable foods shouldn’t stay in this range for more than 2 hours (or 1 hour above 32°C/90°F).
| Temperature Range | Food Safety Guidance |
|---|---|
| Below 4°C / 40°F | Safe for perishables; use coolers or frozen packs |
| 4°C to 60°C / 40°F to 140°F | Danger Zone: limit to under 2 hours |
| Above 60°C / 140°F | Safe for hot-held food; maintain for cooked meals |
On a spring canoe trip in British Columbia, I used frozen vacuum-packed meats on Day 1 and vegetables by Day 2, leveraging near-0°C (32°F) nights. By Day 3, I switched to dehydrated meals to avoid spoilage, as detailed in my Prepping Techniques for Dehydrating Hiking Food.
For official guidelines, check:
Plastic vs. Glass Containers – What’s Right for Your Trip?
Choosing between plastic and glass backpacking food containers depends on your trip’s demands.
Plastic Containers: The Workhorse of the Trail
- Pros: Lightweight, shatterproof, budget-friendly, stackable, often freezer-safe and leak-resistant (look for BPA-free or Tritan).
- Cons: May absorb odours, warp in extreme cold, less sustainable if single-use.
Best for: Backpacking, multi-day treks, canoe trips, winter outings where weight matters.
Glass Containers: For the Gourmet Camper
- Pros: Non-porous, no odours or stains, great for liquids, durable if tempered or borosilicate.
- Cons: Heavy, breakable, risky in cold weather due to thermal shock.
Best for: Short paddling trips, car camping, or basecamp setups with liquid-heavy meals.
Chef’s Insight:
I use plastic for bulk ingredients and snacks, saving small glass jars for oils or sauces to preserve flavour. A hybrid approach balances weight and quality.
Spices & Seasonings – Small Containers, Big Flavour
Spices transform bland trail food into memorable meals. Packing them efficiently for paddling meal prep requires lightweight, moisture-resistant containers.
Options for Transporting Spices:
- Mini plastic vials: Lightweight, tight-sealing, great for short trips.
- Reusable silicone pouches: Flexible, durable, ideal for spice blends.
- Small glass jars: Best for flavour protection on longer trips, but heavier.
- DIY spice kits: Use pill organizers or sealed straws for custom blends.
Protect spices from moisture by storing them away from coolers or water bottles. Pre-mix blends like taco seasoning or campfire herbs at home to save space, as shown in my Prepping Techniques.
Storing Liquids – Leak-Proofing Oils, Sauces, and Syrups
Leaky liquids like olive oil can ruin gear and waste calories. Effective liquid storage ensures trail food storage is mess-free and flavorful.
Best Options for Liquid Storage:
- Plastic squeeze bottles: Lightweight, secure caps, ideal for oils or syrups.
- Silicone travel bottles: Flexible, leak-proof, compress as used.
- Small glass bottles: Best for flavour-sensitive liquids like dressings, but heavier.
- Vacuum-sealed pouches: Great for sauces or soups, store carefully to avoid punctures.
Temperature Tip: Cold can solidify oils; hot weather risks spoilage in dairy-based sauces.
Vacuum-Packing for Trail Chefs
Vacuum-packing elevates trail food storage, extending shelf life, reducing bulk, and protecting food. It removes air to prevent spoilage and compresses meals for tight packs.
Foods Ideal for Vacuum Sealing:
- Proteins: Marinated meats, tofu, or fish; reduces odour.
- Pre-cooked meals: Pasta, chili, or stews for boil-in-bag reheating.
- Dehydrated meals: Homemade or store-bought, with desiccants for longevity.
- Snacks: Trail mix, dried fruit, or bars in portions.
Advantages: Saves space, contains odours (key in bear country), simplifies portioning.
Challenges: Requires a vacuum sealer; bags can puncture, so use protective sacks.
Bags vs. Rigid Containers – When to Use Each
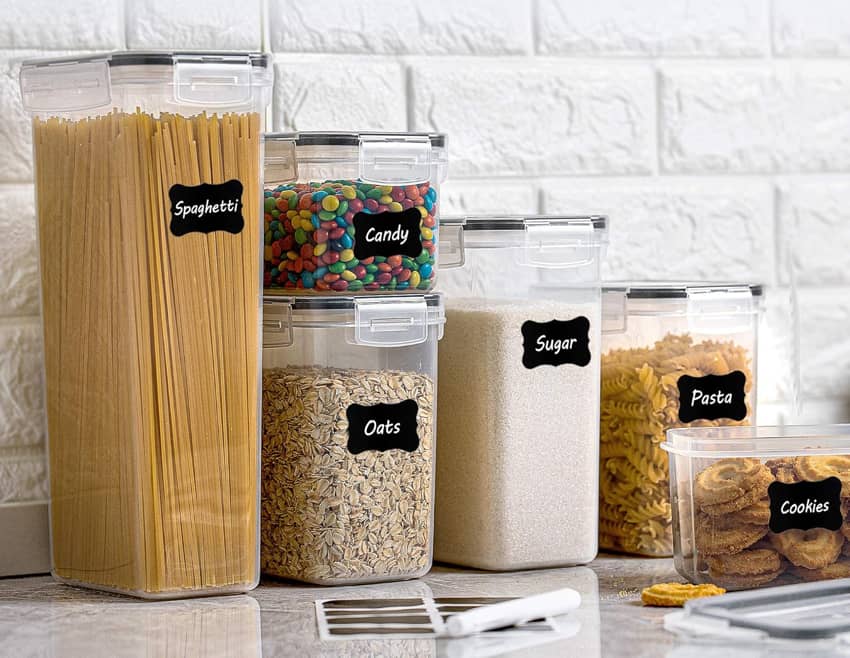
Choosing between bags and rigid containers depends on your trip’s needs. I rely on Ziploc freezer bags for most of my food due to their lightweight, durable, and airtight design, perfect for snacks, dehydrated meals, or spices. For rigid containers, I use the Vtopmart container set from Amazon, which I also use extensively at home. These high-quality containers come in various sizes with clip-on sealed lids, offering excellent protection for fragile items or liquids. They’re stackable, leak-proof, and durable for both trail and kitchen use.
Disclosure: Some links on this page are affiliate links. If you make a purchase, I may earn a small commission at no extra cost to you. I only recommend gear and products I personally use and trust on the trail. Your support helps keep Trail Eating running, bringing you more camping recipes and tips!
Resealable Bags (e.g., Ziploc Freezer Bags):
- Pros: Ultra-lightweight, flexible, reusable (washable), great for snacks or dried goods.
- Cons: Less protective, can be punctured or crushed easily.
Rigid Containers (e.g., Vtopmart):
- Pros: Protects delicate items (crackers, eggs), leak-proof for liquids, and stackable.
- Cons: Bulkier, heavier, takes up more pack space.
Use a hybrid system: Ziploc bags for lightweight items, Vtopmart containers for fragile or liquid foods. Store bags in dry sacks or bear canisters for added protection.
Sustainability in Trail Food Storage
Sustainable trail food storage reduces waste and weight. Explore more eco-friendly tips in my Sustainability and Leave No Trace category.
- Reusable silicone bags: Durable for multiple trips.
- Quality containers: Invest in Vtopmart or similar for longevity.
- Minimize packaging: Portion food at home, leave bulky packaging behind.
- Pack it in, pack it out: Use a dedicated trash bag for waste.
Storage for Paddling Trips – Water Changes Everything
Paddling meal prep requires waterproof storage to handle splashes or capsizes.
- Waterproof containers: Use Vtopmart containers or dry boxes for crushable items.
- Buoyancy: Ensure bags float or are retrievable if dropped.
- Puncture protection: Store Ziploc or vacuum-sealed meals in padded dry sacks.
- Saltwater trips: Use corrosion-resistant materials for containers.
Pro Packing Tips From a Chef
- Layer meals by day: Keep today’s meals on top in Ziploc bags or Vtopmart containers, as detailed in my menu planning guide.
- Colour-code containers: Differentiate meals, snacks, or staples.
- Label everything: Use markers on Ziploc bags or stickers on Vtopmart containers.
- Scent management: Airtight Vtopmart containers reduce odors in bear country.
- Clean sustainably: Use a scrubber, biodegradable soap, and stay away from water sources.
Trail’s End: Your Food Storage Takeaways
Mastering trail food storage with Ziploc freezer bags, Vtopmart containers, and smart packing ensures tastier, safer meals. Experiment with these tips to find your perfect system. For more, check my Prepping Techniques for Dehydrating Hiking Food or explore my Dehydrated Recipes collection. Share your storage hacks on Pinterest, Facebook, or X!
Want more trail cooking tips? Sign up for the Trail Eating Newsletter for a free eBook with my top 12 trail cooking tips for beginners.